Projects
Data Refinery Projects represent groupings of Sources and provide a way to assign users and permissions to the data contained within its Sources. Projects are created and managed through Data Refinery Designer (DR Designer) under the Projects tab or the Data Refinery Designer API (DR Designer API).
Table of contents
How to Create a Project
By creating a Project, Sources can be grouped for querying. To create a Project, a user must have the PROJECT_ADMIN or PROJECT_CREATOR permission. See Permissions and Roles for more information. Follow the steps below to create a Project.
-
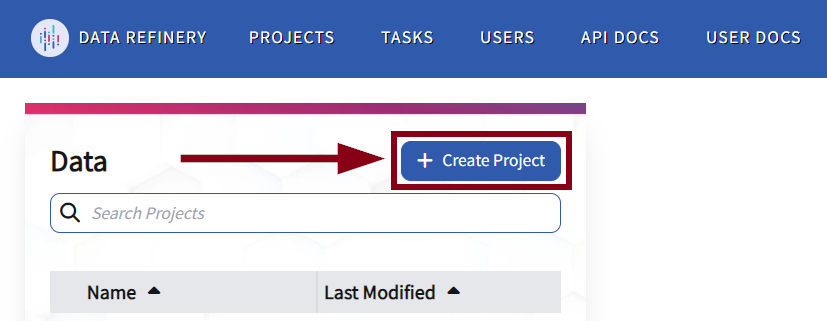
On the Projects page, click the Create Project button above the Projects list.
-
Fill out the necessary fields in the “Create Project” form.
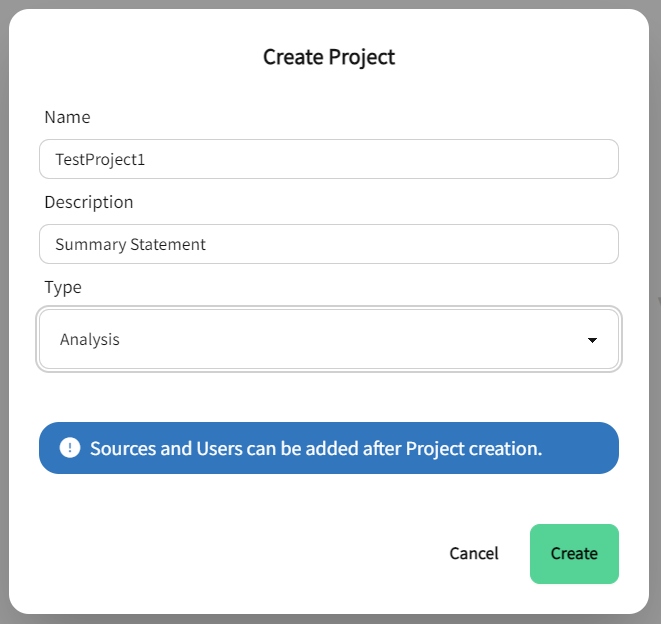
- Name: Required. Display Name of the Project queryable via DR Designer API.
- Description: Required. A description of the contents or purpose of the Project.
- Type: Required. Project types indicate the intended usage of the Project. Although informational for now, this value may be used to support different Project scenarios.
- Analysis: Baseline Project type for general usage scenarios.
- Dashboard: Projects with output intended for integration with Business Intelligence tools such as PowerBI or Tableau.
- Enrichment: Projects with output intended for integration with an external data management tool.
- Generic Operational: Same as the Analysis type for now.
Note. To update a Project, a user must be assigned the PROJECT_ADMIN permission or have the Owner User Project Role (UPR) on the Project. For more information about user access, see Permissions and Roles.
-
Click Create once the form has been completed.
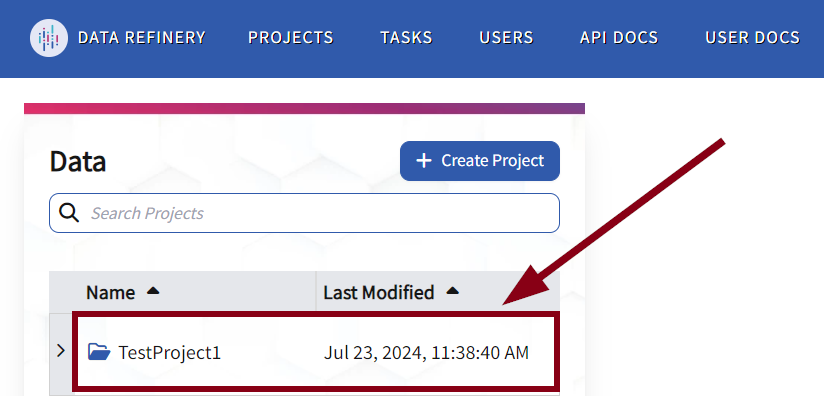
Once the Project has been created, it will appear in the Projects list.

The Project creator will automatically be assigned the Owner UPR for the new Project. To transfer ownership to another user, see the Editing User Associations section.
Refer to the POST (Create Project) API in the DR Designer API Projects Reference for instructions on how to create Projects programmatically.
How to Update Project Details
To update Project details in DR Designer, a user must be assigned the PROJECT_ADMIN permission or Owner UPR to edit the Project information.
To edit the Project details,
-
On the Projects page, select the desired Project to open the details page to the right of the Projects column.
-
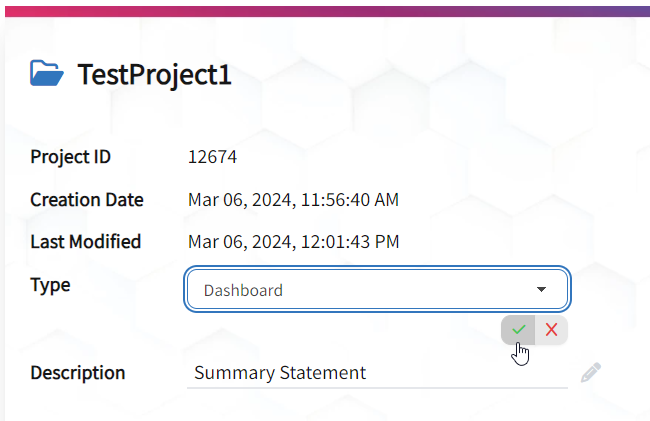
Once the Project details are open, the “Type” and “Description” fields can be updated.
When hovering over “Type” or “Description,” a user can select either field to edit.
- For Project Type, a user must click the field for a drop down arrow to appear. Select the arrow to view the other options.
- For Project Description, edit the field by selecting the box and typing a new response.
-
Select the green check mark that appears directly below the “Type” or “Description” fields (see image below) or click away for a user to save the change. Select the ‘X’ to discard the changes.
Note. The name of the Project can only be updated via DR Designer API.
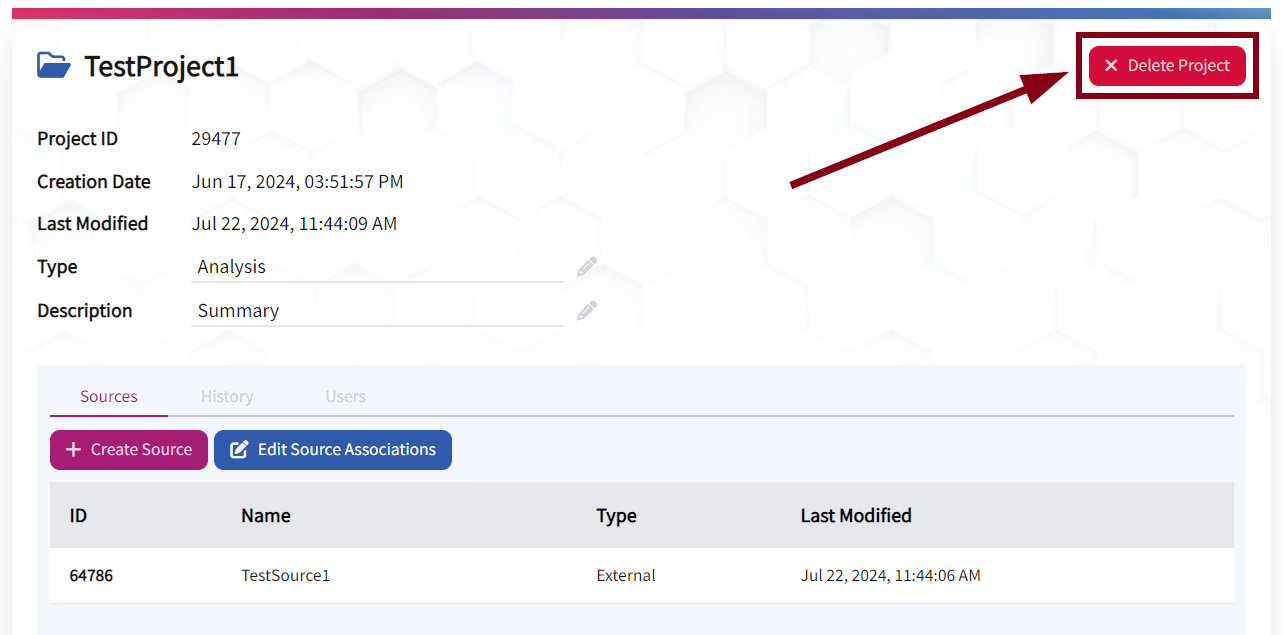
How to Delete a Project
To delete a Project in DR Designer, the user must be assigned the PROJECT_ADMIN permission or have the Owner UPR on the Project. For more information about user access, see Permissions and Roles.
Follow the steps below to delete a Project.
-
While viewing the Projects list, locate the desired Project to delete.
-
Select the desired Project to open the details page to the right of the Data column.
-
Click the Delete Project button in the top right corner of the Project details.
-
A dialog box will appear. Read the prompt and click Delete to remove the Project.

Refer to the DELETE (Delete Project) API in the DR Designer API Projects Reference for instructions on how to delete Projects programmatically.
How to Manage Project-Source Associations
On the Projects page, a user with the proper permissions can edit Source associations to a Project. However, by un-linking these connections, users could lose access to certain Sources. Read the Editing Project-Source Associations procedure to learn how to manage Project-Source associations.
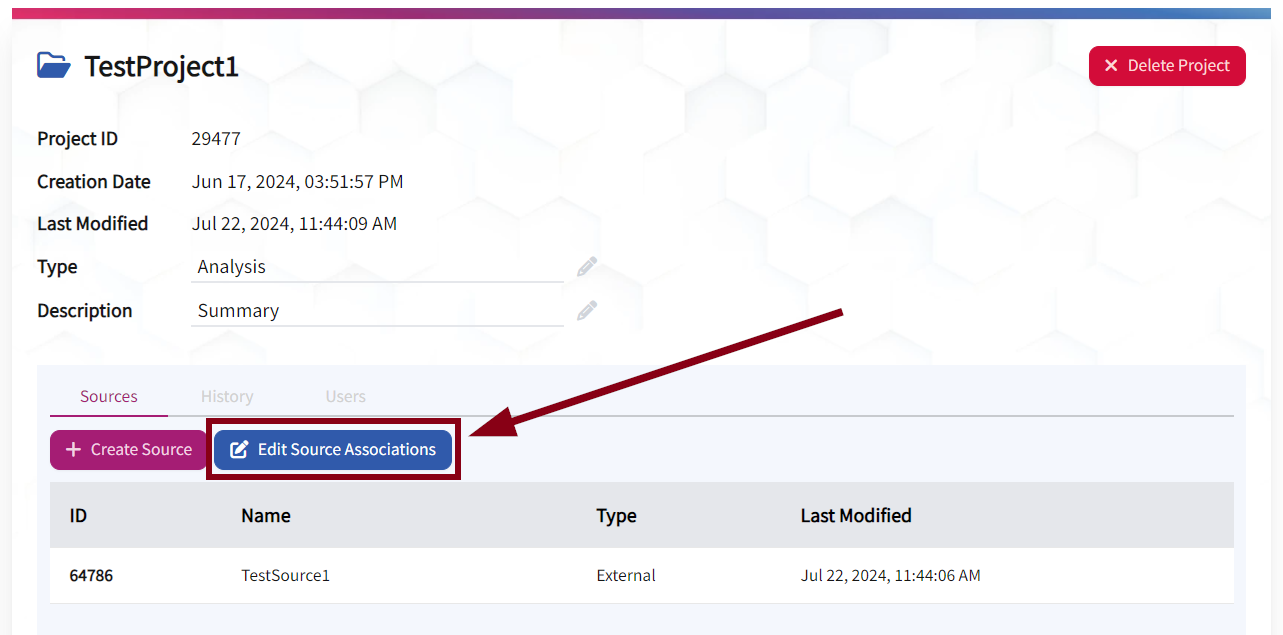
Editing Project-Source Associations
To edit Project-Source associations under the Projects tab, the user must be assigned the PROJECT_ADMIN permission or have the Owner UPR on the Project. For more information about user access, see Permissions and Roles. Follow the steps below to edit Project-Source associations.
-
On the Projects page, select the desired Project from the Project list that a user would like to edit Source associations.
-
Once selected, click the Edit Source Associations button below the Project details.
-
A Source Associations form will appear. A user can see the Sources they have permission to view. All of the Sources listed in this form will indicate whether the Source is associated to the selected Project.
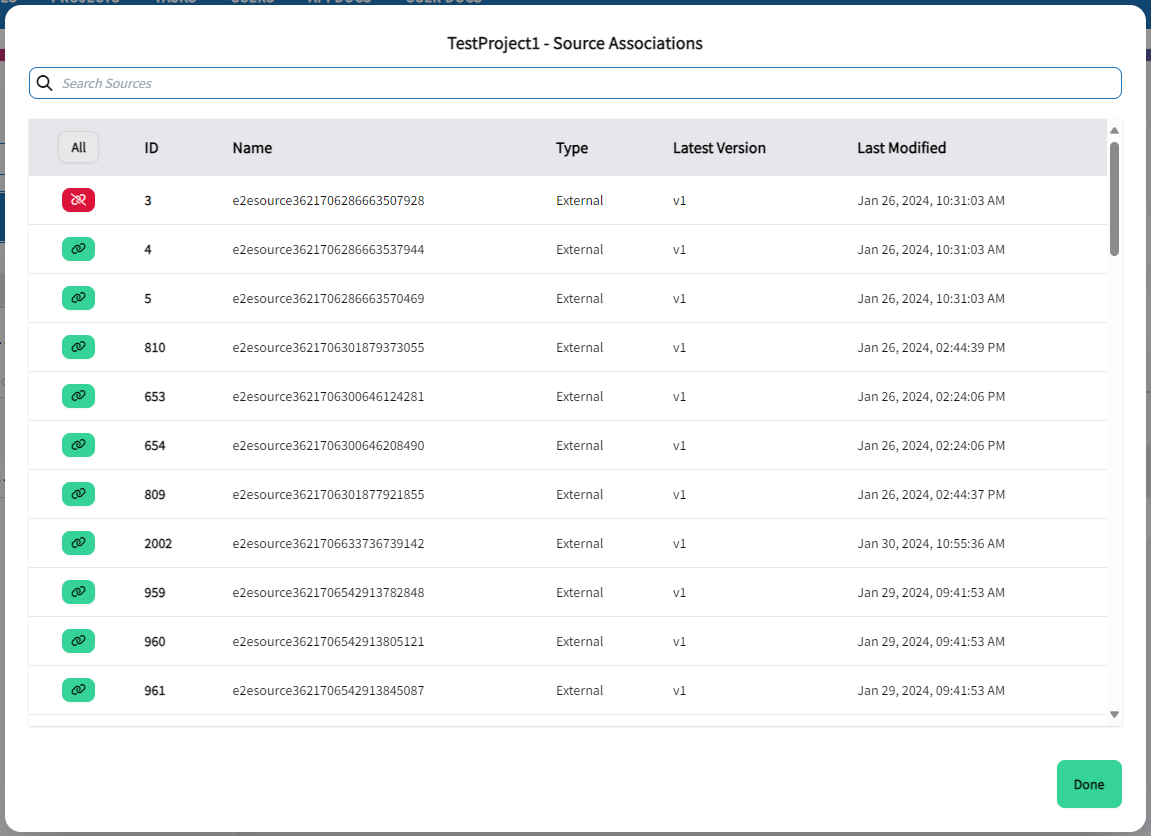
The first column on the form can be used to filter Sources that are linked or un-linked to the Project. For a more efficient selection, click the All button to switch the filtered view to linked Sources. By clicking the same button again, the filtered view will change to un-linked Sources. To view All Sources, select the button an additional time to return to the default view of Sources.
The icons in this column indicate the action a user can take to link or un-link a Source from a selected Project. The button below indicates the action to un-link a Source by selecting it.

Moreover, the following button indicates the action to link a Source by selecting it.

-
A user can review their listed Sources to determine which Sources should be linked to the selected Project. Once decided, a user can click the Done button in the bottom right corner of the Source Associations form.
Refer to the DR Designer API Projects Reference to manage Project-Source associations programmatically.
How to Manage User Associations
Users must be associated to a Project to work with and query data. Users can be created and managed under the Users tab and their Project associations are managed under the Projects tab. Only a User with the Owner UPR or PROJECT_ADMIN permission can manage these associations.
Read the Editing User Associations procedure to learn how to manage User associations.
Editing User Associations
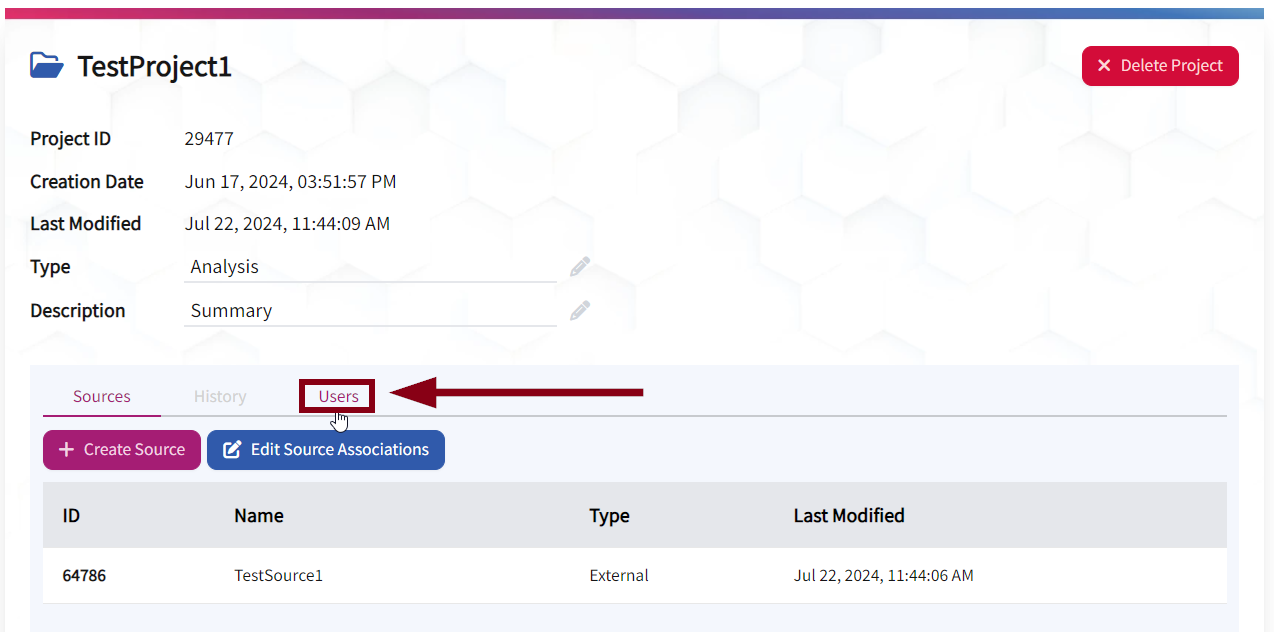
Editing user associations can be completed by logging into DR Designer and navigating to the Projects page. Read the following steps to edit user associations.
-
On the Projects page, select the desired Project from the Project list where a user would like to edit User associations.
-
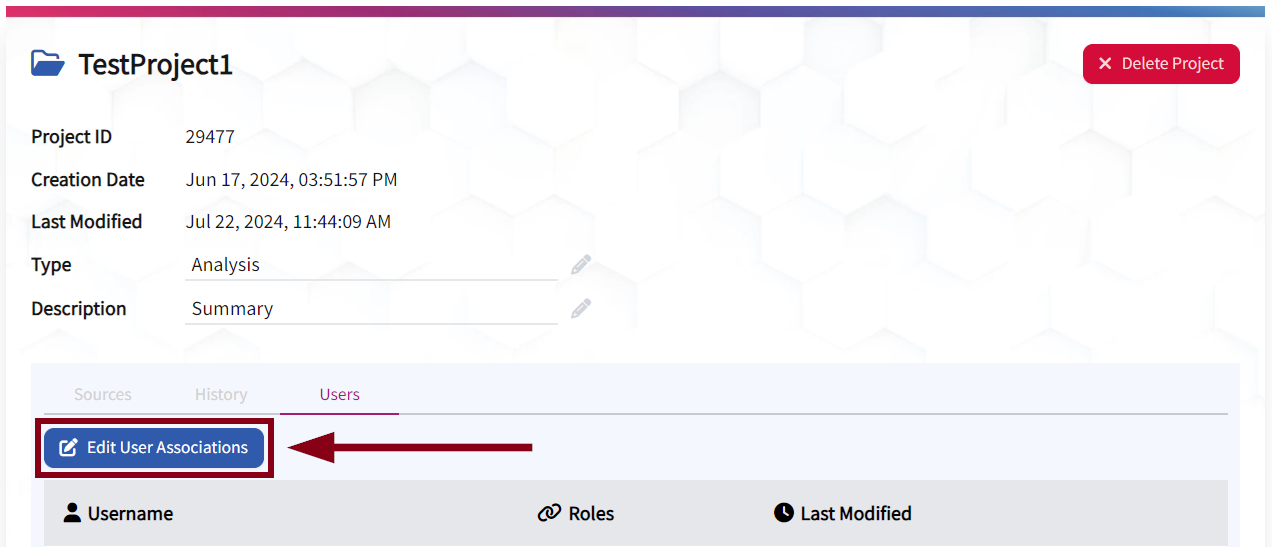
Once selected, the Project details will open to the right of the Projects list. Click the Users tab located below the Project details.
-
By selecting the Users tab, a table will appear listing all users who are associated to the Project. To edit the user associations, click the Edit User Associations button.
-
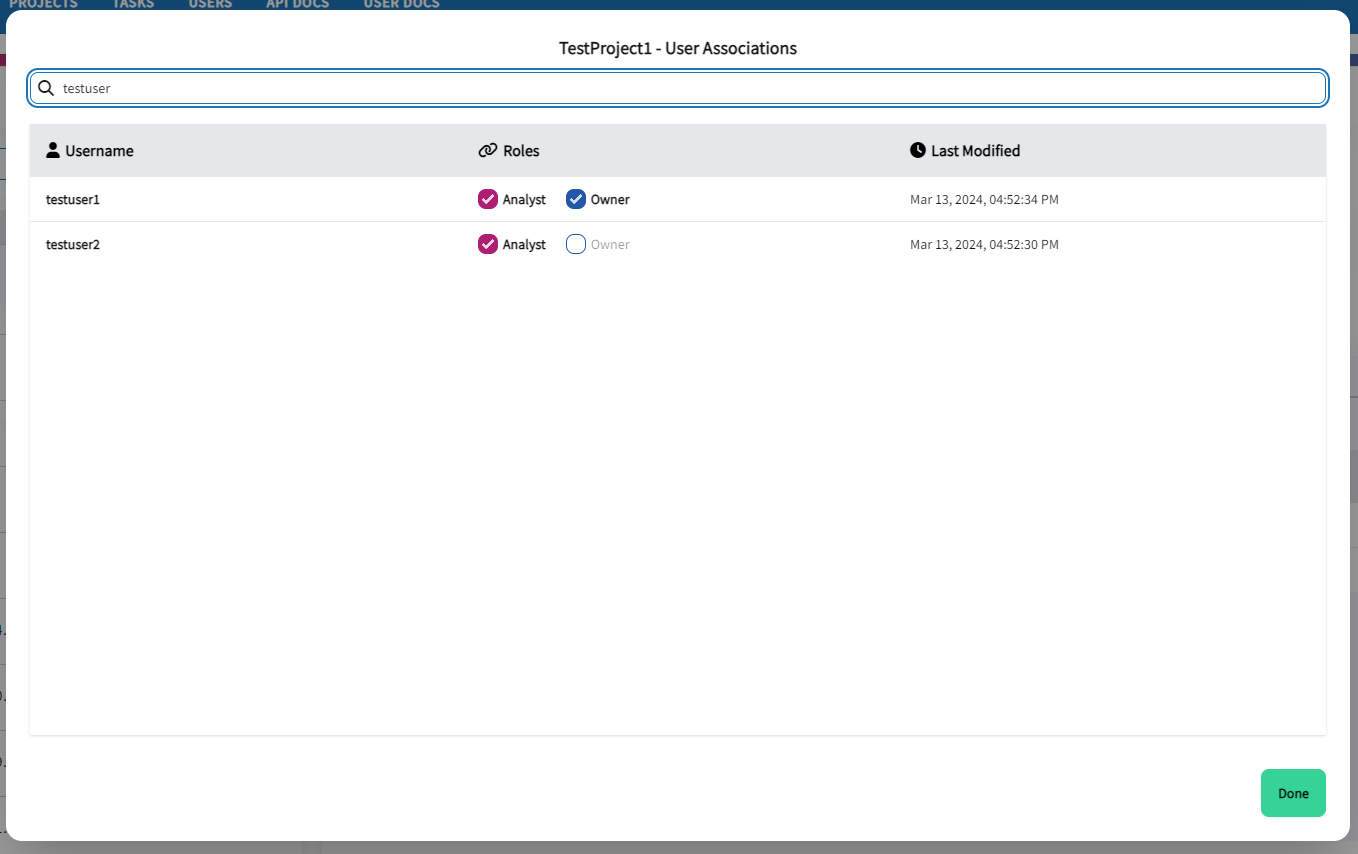
A User Association form for the Project will appear. This form will list all users available to the editor based on UPRs and permissions given to that user. In this form, the user can grant Analyst or Owner UPRs for that specific Project by checking the correct boxes.
Scroll through the User list, or use the search bar at the top of the form to find a specific user.
-
When the user associations have been updated, select the Done button to return to the Project details with an updated list of users associated to the Project.
A user with an Owner UPR, who edits user associations, can remove themselves and transfer ownership of the Project to another user. This transaction cannot be undone by the original Owner. By deselecting the Owner box for themselves, the user relinquishes any authority over the Project.
Note. If a user intends to transfer ownership to another user and remove themselves as Owner, edit the user associations to add the new Owner first, then remove the Owner role from the original user’s account.