User Creation and Administration
This document will walk through the process of creating new users and managing their information within Data Refinery Workbench.
Table of contents
Prerequisites
Only users with the USER_ADMIN permission can create new users (see Permissions and Groups for more information).
If Single Sign-On (SSO) is configured, a user will be automatically created upon first login through the SSO provider. See the Single Sign-On page for more information on SSO.
Creating a User
To create a new user, there are three required parameters and one optional parameter. The required parameters are username, email, and password. The only optional parameter is to assign permissions, which can vary based on the objective of the user. To understand permissions in Data Refinery Workbench, see the Permissions and Groups page.
User Creation via Data Refinery Workbench
To create a new user in Data Refinery Workbench,
-
Begin by selecting the User tab in the top navigation.

-
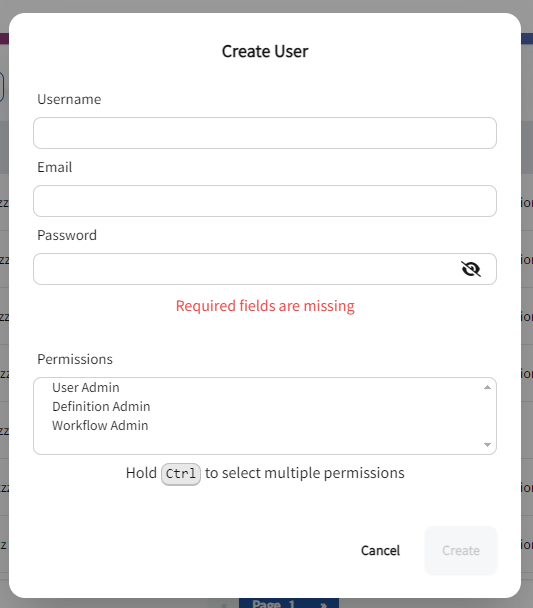
Next, select the Create User button to the right of the page. A form will appear.

-
In the form, fill out the following details:
- Username
- Must start with a letter (a-z) or underscore (_).
- Subsequent characters can be letters (a-z), numbers (0-9), underscores (_), or dollar signs ($).
- Cannot exceed 127 characters.
- Cannot use the word “public” or any of the reserved words found here.
- Email
- Employer or Organization email address is highly recommended, especially for password recovery.
- Password
- Must be at least 8 characters, but no more than 46 characters.
- Must contain a capital letter (A-Z).
- Must contain a number (0-9).
- Cannot contain any of the following characters: single quotation mark (‘), double quotation mark (“), backslash (), forward slash (/), or an at sign (@).
- Username
Note. Only a USER_ADMIN can assign permissions to a user. See see Permissions and Groups for more information.
- Select the Create button once the fields are complete.
The new user should populate on the Users list and the new user can sign in with the credentials the creator made.
User Creation via Data Refinery Workbench API
To create a new user via the Data Refinery Workbench API, provide the aforementioned parameters in a POST request. The following POST request can be used to create a new user.
curl -X 'POST' \
  'https://example.workbench.kingland-data-refinery.com/api/users' \
  -H 'accept: application/json' \
  -H 'Content-Type: application/json' \
  -H 'Authorization: Bearer your_token_here' \
  -d '{
    "username": "exampleUser",
    "email": "exampleUser@example.com",
    "password": "A1b2c3d4",
    "permissions": [
      "USER_ADMIN"
    ]
  }'
The response from this request will look like the following:
{
  "ID": "some-uuid",
  "createdAt": "2024-01-18T15:27:31.030308Z",
  "updatedAt": "2024-01-18T15:27:31.030308Z",
  "deletedAt": null,
  "userName": "exampleUser",
  "email": "exampleUser@example.com",
  "lastUpdatedDBPassword": "2024-01-18T15:27:32.381024286Z",
  "userProjectRoles": [],
  "permissions": [
    {
      "ID": 2000,
      "permissionName": 1
    }
  ]
}
Changing User Password
After creation, the new user should update their password. This new password should be private to the user. Updating the password can be accomplished by resetting the password in Data Refinery Workbench or Data Refinery Workbench API. Only the user themselves can update their password. Additionally, a new user can use the “Forgot Password” flow to change their password.
Password Reset Via Data Refinery Workbench
To change a user’s Data Refinery Workbench password, follow the procedure below.
-
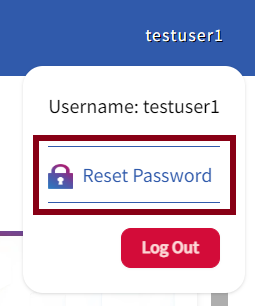
Once logged in, select the username in the top right corner.

-
Click Reset Password
-
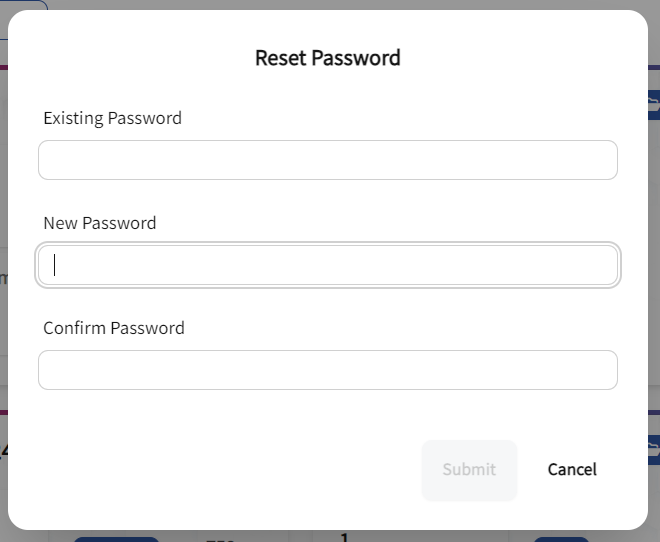
Fill out the necessary fields in the “Reset Password” form.
-
Click Submit when the form is completed.
Password Reset Via Data Refinery Workbench API
Using the Data Refinery Workbench API, the following request can be used to reset a user’s password.
curl -X 'PUT' \
  'https://example.workbench.kingland-data-refinery.com/api/users/{your-user-id}/password' \
  -H 'accept: application/json' \
  -H 'Content-Type: application/json' \
  -H 'Authorization: Bearer your_token_here' \
  -d '{
    "oldPassword": "A1b2c3d4",
    "newPassword": "NewSecurePassword1"
  }'
The user’s new password may now be used during login.
Updating a User via Data Refinery Workbench
To update a user in Data Refinery Workbench, users must have the USER_ADMIN permission.
-
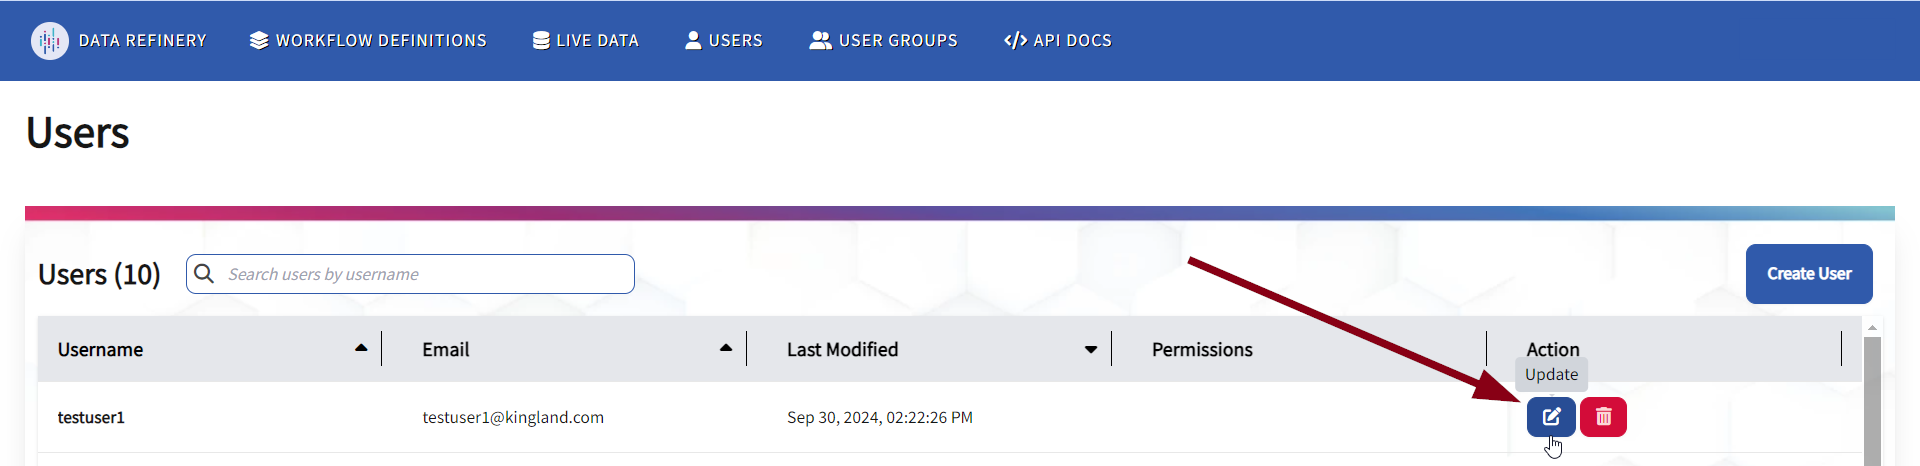
After logging in to Data Refinery Workbench, select the Users tab in the navigational bar at the top of the page.
Once selected, the Users page should render a list of all users in Data Refinery Workbench.
-
The search bar is available to find a specific user. Type the username, followed by the Enter key. A refined list should render to find the correct user(s).
Otherwise, a user can scroll through the list of available users to find the correct user.
Note. The search bar requires an “exact match” to find a user. Partial names or spelling errors will yield no results.
-
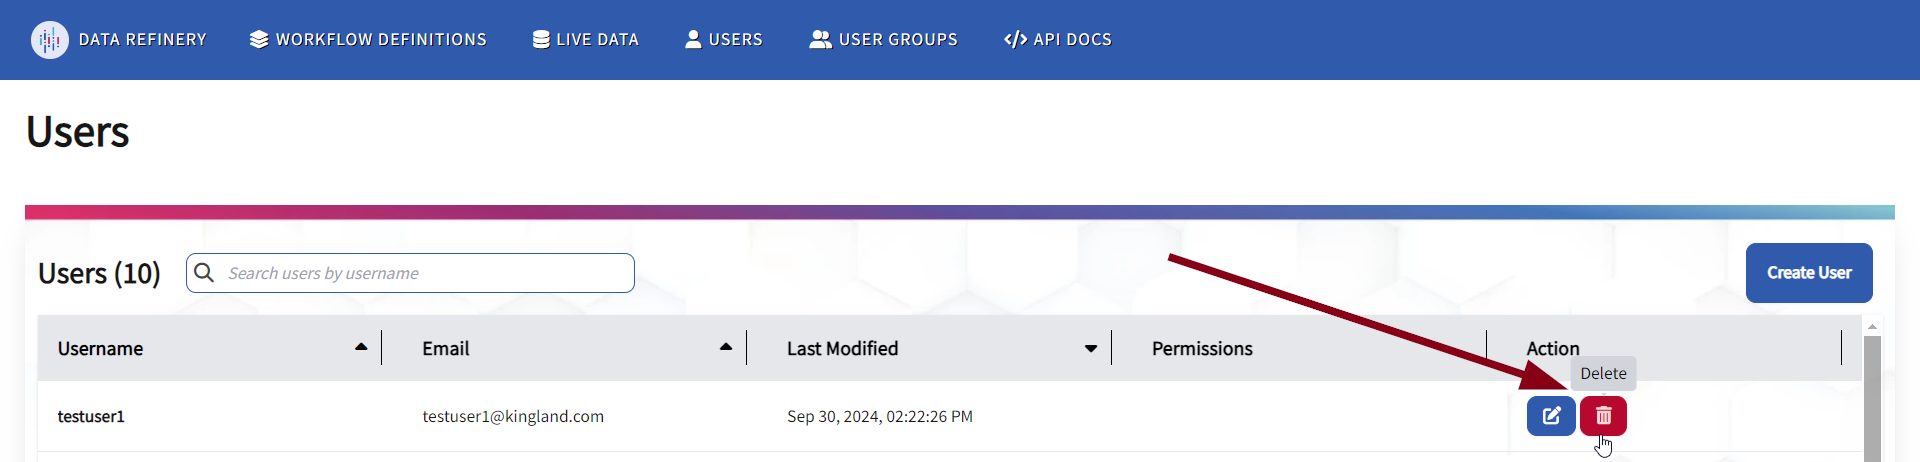
When the desired user is found, their information (username, email, date of last modification, and permissions) should be listed. To the right of that information is the Action column. To edit the user, select the Update button in the Action column that matches the row containing the user.
-
A form will appear, providing options to change the user email address and permissions in Data Refinery Workbench.
Type a new email address or select new permissions to update the user. Select the Update button to complete the action.
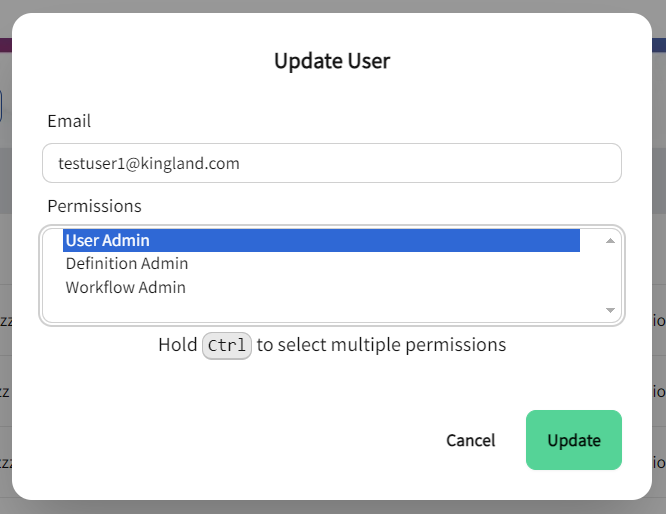
If no changes are made, a user can select the Cancel button to return to the Users list.
Note. Usernames cannot be updated in the UI.
Deleting a User via Data Refinery Workbench
To delete a user in Data Refinery Workbench, users must have the USER_ADMIN permission.
-
After logging in to Data Refinery Workbench, select the Users tab in the navigational bar at the top of the page.
Once selected, the Users page should render a list of all users in Data Refinery Workbench.
-
The search bar is available to find a specific user. Type the username, followed by the Enter key. A refined list should render to find the correct user(s).
Otherwise, a user can scroll through the list of available users to find the correct user.
Note. The search bar requires an “exact match” to find a user. Partial names or spelling errors will yield no results.
-
When the desired user is found, their information (username, email, date of last modification, and permissions) should be listed. To the right of that information is the Action column. To delete the user, select the Delete button in the Action column that matches the row containing the user.
-
A dialog box will appear to warn the USER_ADMIN that the selected user will be permanently removed from Data Refinery Workbench, including all their User Group associations. To acknowledge the warning and confirm deletion, the USER_ADMIN must select the Delete button.
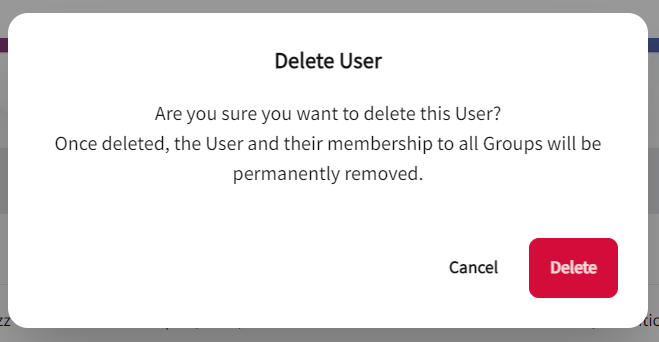
After the selection, the user can no longer be found in Data Refinery Workbench.
Assigning Users to User Groups
When a user logs into Data Refinery Workbench for the first time, there are no default permissions given to the user and there is no default Group membership. Permissions must be explicitly granted (assigned) to users to use secured APIs, and users must be assigned to User Groups to modify Workflow Data in Data Refinery Workbench.
To add users to User Groups, see the Permissions and Groups page.