Sources
Data Refinery Sources are the means to provide data to, and access it within, Data Refinery. Sources are created and managed under the Data Refinery Designer (DR Designer) Projects tab. Sources are displayed under Projects as the Source is associated to the Project. A user can view Projects and Sources with proper permissions or by virtue of being assigned a User Project Role (UPR). Once a Source is created, use the Source Upload action to bind the Source to its external data. Sources can also be managed through the Data Refinery Designer API (DR Designer API).
Table of contents
- How to Create a Source
- How to Update Source Details
- How to Sample Data
- How to Delete a Source
- How to Manage Project-Source Associations
- External Sources
- Documentation Sources
- How Documentation Sources Work
- How to Create a Documentation Source
- How to Configure Attribute Targets
- How to Update Attribute Targets
- How to Delete Attribute Targets
- How to Add Additional Context for AI Extraction
- How to Upload a Document
- How to Upload an Image
- Advanced Documentation Configuration
- Data Refinery AI Privacy Information
- Streaming Sources
How to Create a Source
Data is made available for querying in Data Refinery through Data Refinery Sources. Follow the steps below to create a new Source.
-
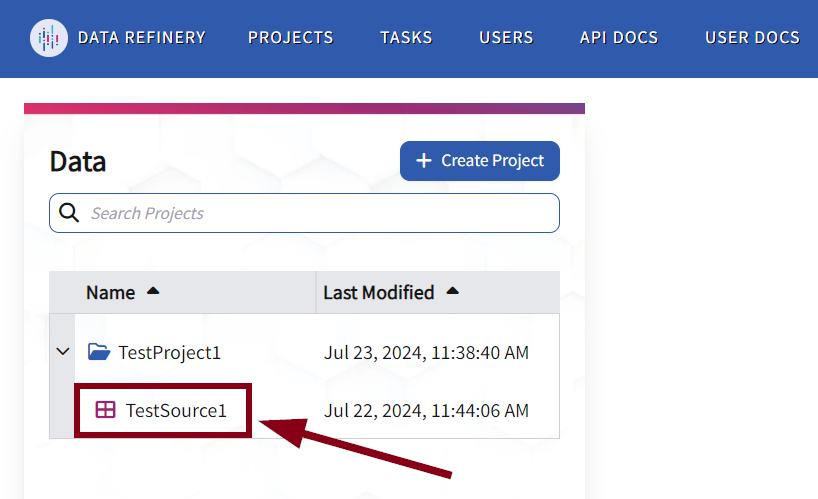
Once logged into Data Refinery Designer, the Projects page will load with the Projects list appearing in a column to the left of the screen. A user should select the desired Project from the list in order to create a new Source.
If a user needs to create a new Project, see How to Create a Project.
-
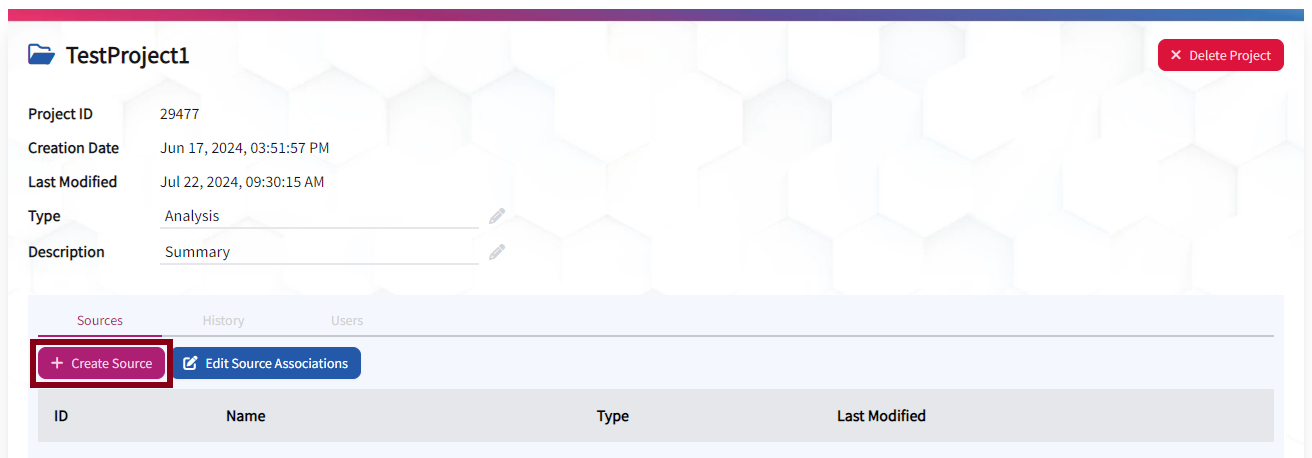
Once the Project has been selected, Project details should appear to the right of the Projects list. Click the Create Source button.
-
Fill out the fields in the “Create Source” form.
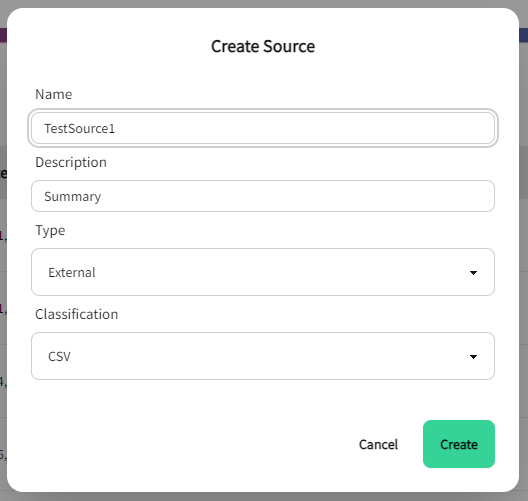
- Name: Required. Preferred Name of the Source.
- Description: Required. Additional details for the Source, explaining Type, and including any special characters.
- Type: Required. Source types indicate characteristics of the data bound to the Source whether it is external, mixed, or finished for external use.
- External: Data from an external system uploaded to be analyzed in Data Refinery.
- Documentation: A Source that uses Artificial Intelligence (AI) models to extract structured Data Attributes from unstructured data files.
- Streaming: Data from an external system received through an API.
- Classification: Required for External Source type. Represents the file type of data that can be uploaded to the source. Options include: JSON, JSONL, CSV, ORC and parquet. Ignored for Documentation Source type.
Note. For more information about different Source types, see External Sources or Documentation Sources below.
-
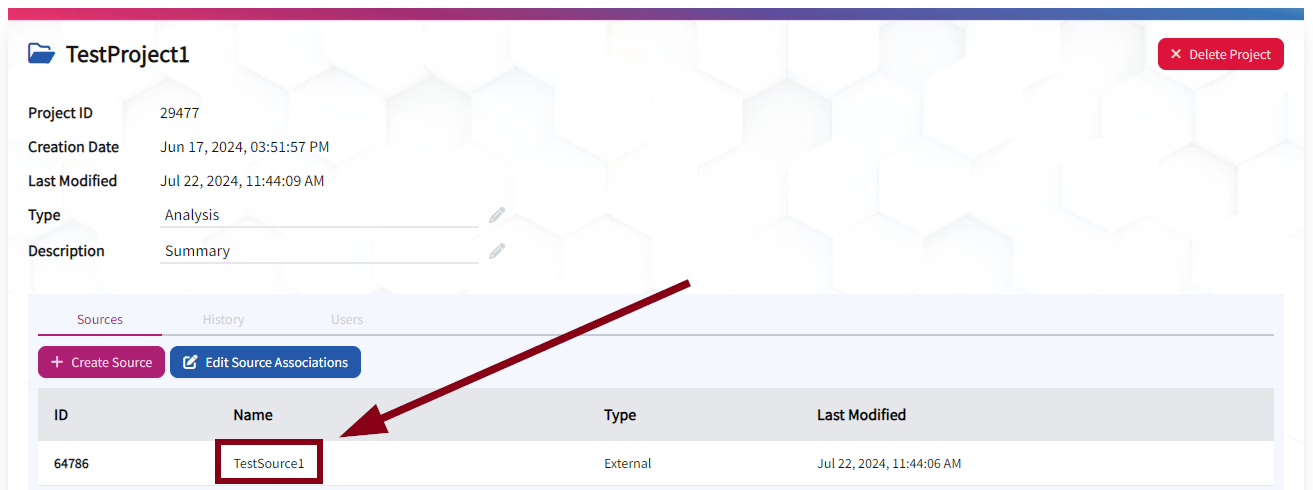
Click Create at the bottom of the form.
Once the Source has been created, it will appear in the Sources section of the Project details.
Refer to the POST (Create a Source) API in the DR Designer API Projects Reference for instructions on how to create Sources programmatically.
How to Update Source Details
Any user who can view a Source in DR Designer has the ability to update Source details. To edit information in an existing Source, follow the steps below.
-
Select the Projects tab in the navigational bar at the top of the page.
-
To locate the desired Source, a user must first search for the Project that the Source has an association to. A user can do this by scrolling down the list or typing the Project name in the search bar. Select the Project among the list to the left of the page and click the arrow to reveal a dropdown list of associated Sources.

-
Select the Source that needs to be updated.
-
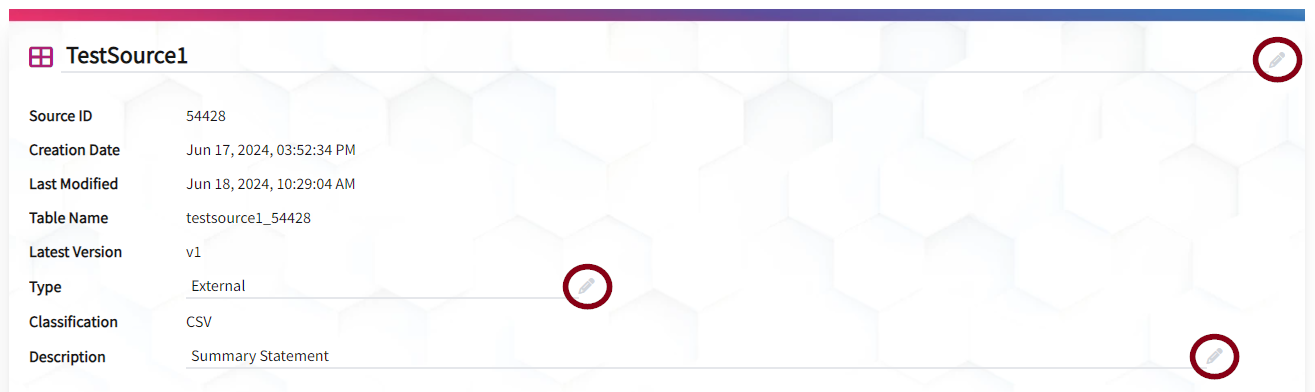
Once the Source details are open, the “Name” and “Description” fields can be updated. This is indicated by the transparent pencil icon to the right of the field.
When hovering over “Name” or “Description,” a user can select one of these fields to edit.
- For Source Name, edit the field by selecting the box and typing a new name. All printable ASCII characters are valid.
- For Source Description, edit the field by selecting the box and typing a new description.
Note. When changing the “Name” of the Source, the underlying table in the Warehouse Database will be renamed. This may cause queries that other users have written to break. Be cautious when performing this type of update!
-
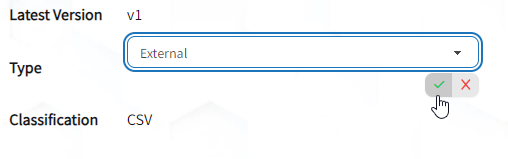
After making an updated selection, select the green checkmark that appears directly below the “Name”or “Description” fields (see image below) or click away to save the change. Select the ‘X’ to discard the changes.
Refer to the PUT (Update Source) API in the DR Designer API Projects Reference for instructions on how to update Sources programmatically.
How to Sample Data
In DR Designer, a limited query is run to show a sample of the data that is uploaded to a Source. This sample is a preview of the data that users can review to ensure the data is in the correct place. Users can view this sample under the Sample Data tab of a Source in DR Designer. To sample the data uploaded to a Source, follow the steps below.
-
To locate the desired Source, a user must first search for the Project that the Source has an association to. A user can do this by scrolling down the list or typing the Project name in the search bar on the Projects page. Select the Project among the list to the left of the page and click the arrow to reveal a dropdown list of associated Sources.
-
Select the Source that a user would like to sample the data.
-
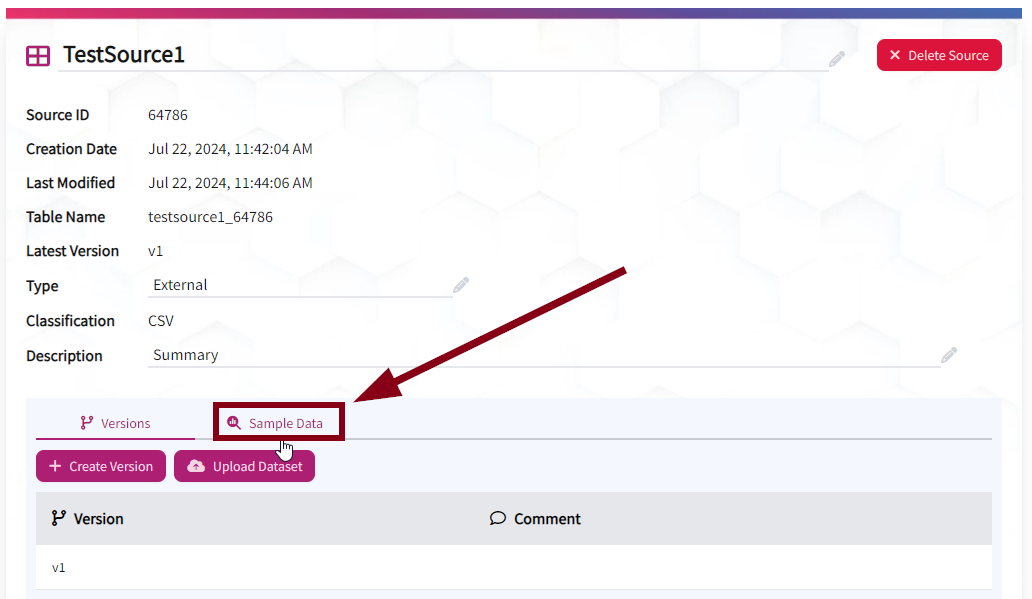
The Source details will open to the right of the page. Click the Sample Data tab.
-
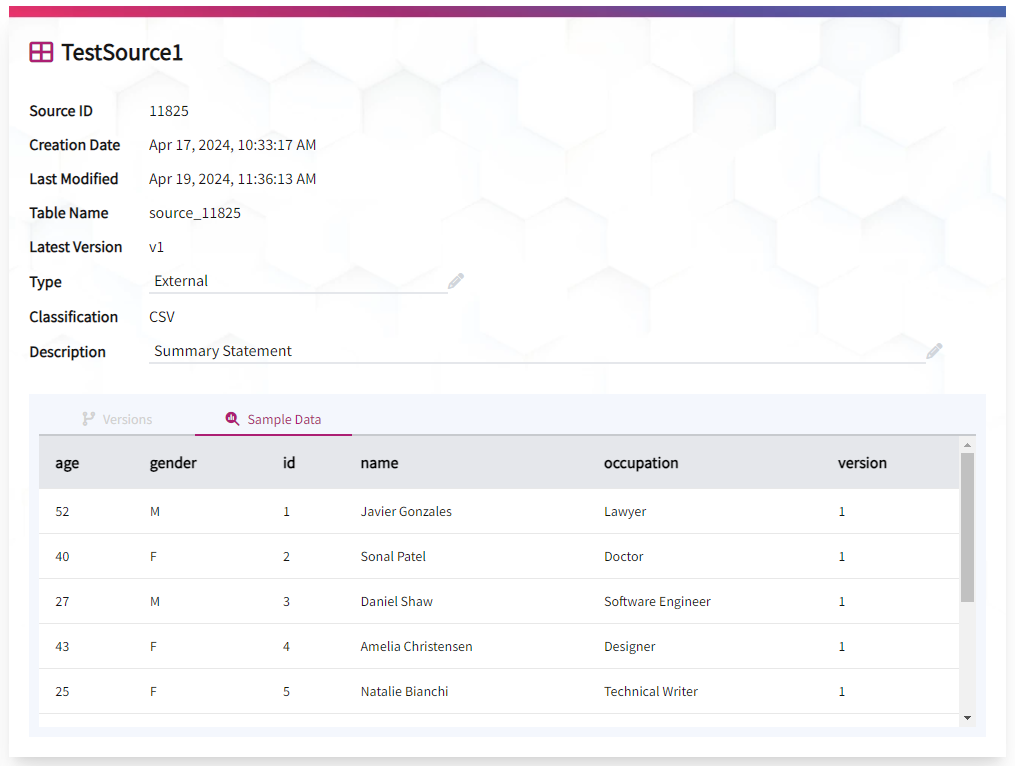
If the data has been uploaded and processed in the database, meaning AWS Glue has crawled the dataset, a table will automatically appear with the first ten entries.
How to Delete a Source
To delete a Source, follow the steps below.
-
On the Projects page, navigate to the desired Project and select the drop down arrow to expose the existing associated Sources.
-
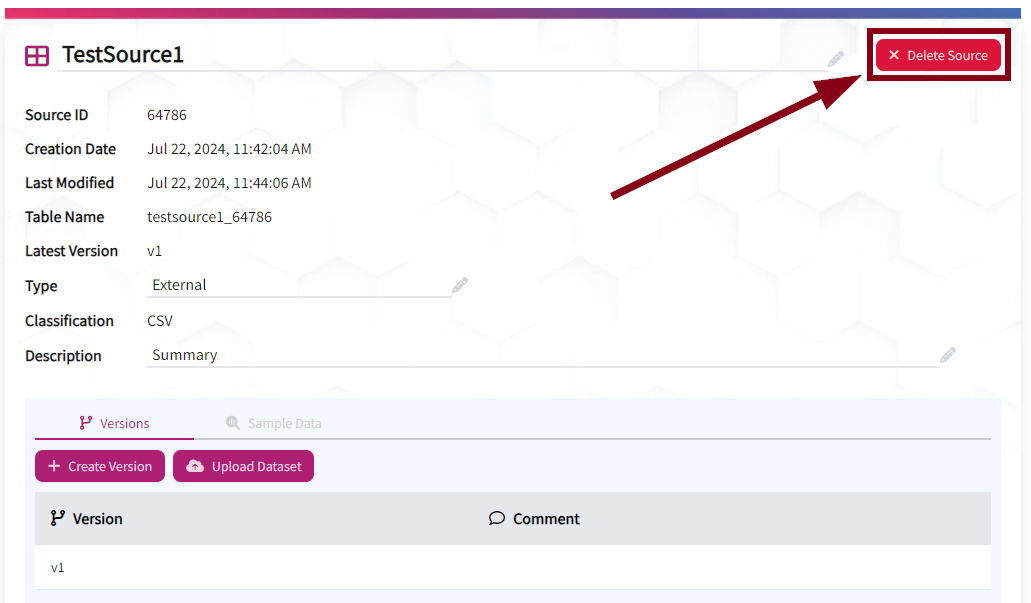
Select which Source a user would like to delete. This will open Source details on the right side of the page.
-
Click the Delete Source button in the top right-hand corner of the page.
-
A dialog will appear, requiring the user to acknowledge that all Project associations and Source versions will be removed before deleting the Source. The user must select both options, enabling a Delete button that completes the task.
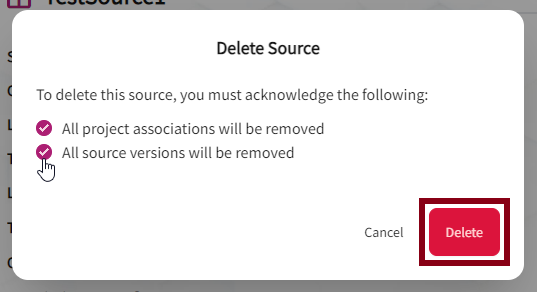
The data will remain queryable, but no new data will be uploaded. As a result, no new schema changes will be queryable. The Source is removed asynchronously, and removal may fail without notice.
Refer to the DELETE (Delete Source) API in the DR Designer API Projects Reference for instructions on how to programmatically delete a Source.
How to Manage Project-Source Associations
Project-Source associations link or un-link Sources to Projects for querying. A user with an Owner UPR or PROJECT_ADMIN permission has the authority to make these associations. See the Editing Project-Source Associations section on the Projects page for more information.
External Sources
External Sources represent data in a structured format from other external systems. The data in these Sources can have new data directly uploaded, and can have multiple versions of the data stored for analysis. Data in these Sources may be deleted.
How to Upload Source Data
Once a Data Refinery Source is defined, it must be bound to external data before it can support queries. The action to bind external data to a Source is called “Upload.” Follow the steps below to upload Source data. If a Source does not have a classification one will be assigned using the extension of the next file uploaded to the Source.
-
To locate the desired Source, a user must first search for the Project that the Source has an association to. A user can do this by scrolling down the list or typing the Project name in the search bar on the Projects page. Select the Project among the list to the left of the page and click the arrow to reveal a dropdown list of associated Sources.
-
Select the Source a user will be uploading data to.
-
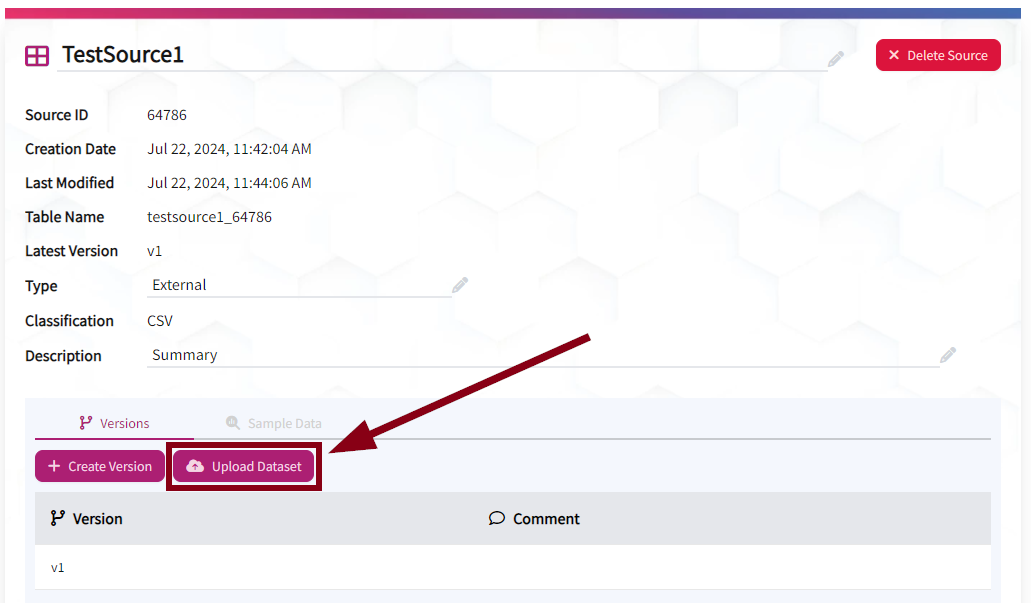
The Source details will open on the right side of the page. Click the Upload Dataset button. This will open an “Upload Dataset” form.
-
Select which version to upload data using the dropdown in the “Upload to Version” field. Then, choose a file to upload by clicking the Choose File button under the “Upload File” field.
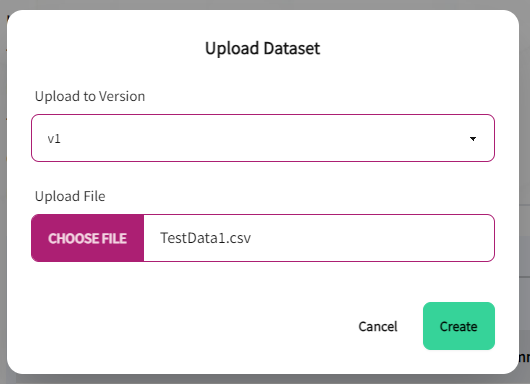
Currently supported file types are CSV, JSON, JSONL, ORC, and Parquet.
-
When the fields are complete, select Create. A green banner will appear at the top of the screen indicating a successful upload of the dataset.

The dataset is now uploaded and linked to the Source. However, the uploaded file will not be available to query until AWS Glue crawls the dataset based on configuration settings.
Refer to the POST (Upload data to Source) sources/{ID}/upload API in the DR Designer API Projects Reference for instructions on uploading a Source programmatically.
How to Create a New Source Version
Data Refinery Sources can be versioned, where each Source can have many versions of data. Data Refinery automatically indexes queries against these versions. To create a new Source Version, follow the steps below.
-
To locate the desired Source, a user must first search for the Project that the Source has an association to. A user can do this by scrolling down the list or typing the Project name in the search bar on the Projects page. Select the Project among the list to the left of the page and click the arrow to reveal a dropdown list of associated Sources.
-
Select the Source a user will be creating a new version.
-
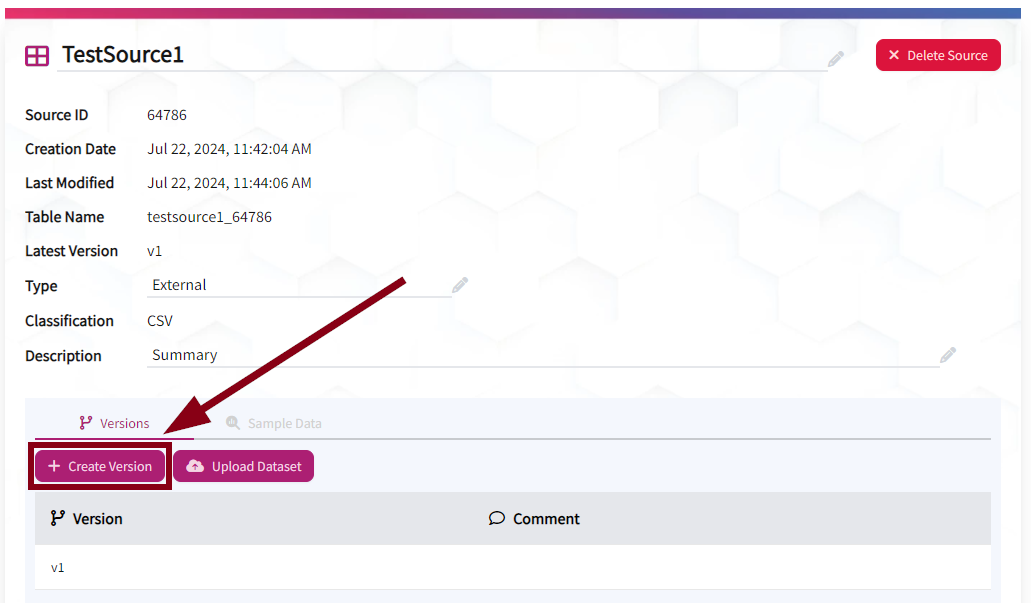
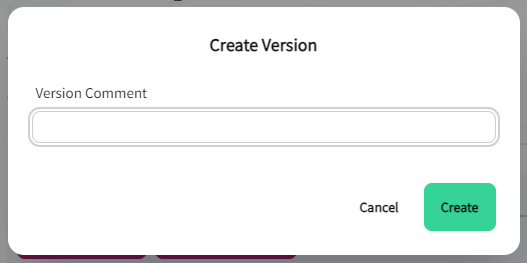
The Source details will open on the right side of the page. Click the Create Version button. This will open a “Create Version” form.
-
Add a version comment, if desired, and click the Create button. The new version should appear under the version tab of the Source details view. A user can now upload data to the new version!
For instructions on how to create a new Version for a Source programmatically, refer to the POST sources/{ID}/versions API in the DR Designer API Projects Reference.
Documentation Sources
Documentation Sources parse documents into structured attributes using Artificial Intelligence (AI). A document refers to a file that provides information such as a letter, report, or account statement. A document can be unstructured, such as a PDF, HTML, or word processing file, or structured such as a JSON or XML file. An image file can also be uploaded and processed. Because of the nature of image data, additional prompt context information is needed to assist the AI model with interpreting the image.
In a Documentation Source, data is not versioned since all attributes represent a point-in-time view of the document and how the AI model extracted the data from the document. Data may not be manually uploaded to a Documentation Source. The only method to add data is by uploading a document and extracting the attributes.
How Documentation Sources Work
A Documentation Source contains a set of Attribute “Targets” and AI model prompt context information. That information is used to request data extraction by an AI Model when a document is uploaded to the Source. The Source, Attribute Targets, and Additional Context are defined before the document is uploaded. The extracted data attributes corresponding with the defined Attribute Targets are then saved to the database for querying.
Users with an appropriate role or the PROJECT_ADMIN permission can create Documentation Sources. Source Attribute Targets define specific data elements to extract from documents. A user can include an optional Attribute Description for each Attribute Target to describe its purpose, though the Description is not provided to the AI model. A user can provide additional prompt context input to the AI model for the Documentation Source, for more detailed data extraction requests.
For more information about Attribute Target configuration, see the Configure Attribute Targets section below. DR Designer prevents Document upload until at least one Attribute Target is defined. Configure all desired Attribute Targets before uploading Documents.
After Attribute Targets have been configured, documents can be uploaded to the Documentation Source using the Upload Document button in DR Designer and images can be uploaded using the Upload Image button. The Source Upload APIs can be used to upload both types of files. Document processing time varies based on document size and the amount of data being extracted, but can take a couple of minutes. Once processing completes, the extracted data is stored in the Warehouse Database and becomes available for querying. For more information on querying options, see the Query the Data Warehouse page.
Example of Additional Context to Process an Image File
Documentation Sources can also process well-known image formats including .gif, .jpg, .webp, and .png files with Additional Context. For example:
A user would like to summarize the relationships between members labeled in an organizational chart. The user defines Attribute Targets such as “Name,” “Role,” and “Manager.” The goal is to establish the working role and relationship between each member in the chart.
A user would provide the following Additional Context to analyze the image.
“The file contains a corporate organizational diagram with different shapes. The document displays the diagram in a top to bottom view, not left to right. All shapes in the image that contain text are organization members having a Name and Position Title. The Name of the member may occur across multiple lines within the shape, and all parts of the Name should be extracted into the Name value. The Position Title occurs in the last line in the shape. Examples of the shapes include rectangles, squares, triangles, ovals, and circles. The shapes are connected by lines or arrows that indicate a top-down “Manager” relationship between the organization members that are represented by the shapes.
The Manager value for each organization member is the name of the organization member parent of the relationship. The Manager value for the organization member at the highest point in the tree is “N/A.” The line will always originate from one shape and terminate at a second shape. If there is not a line that directly connects two shapes, then there is not a relationship that should be extracted for them.”
A few iterations of the AI context might be needed to perfect the analysis of the organizational chart. A user should be as specific as possible to their request given to the AI.
How to Create a Documentation Source
Data is made available for querying in Data Refinery through Data Refinery Sources. Follow the steps below to create a new Documentation Source.
-
Once logged into DR Designer, the Projects page will load with the Projects list appearing in a column to the left of the screen. Select the desired Project from the list in order to create a new Documentation Source.
If a user needs to create a new Project, see the How to Create a Project page.
-
Once the Project has been selected, Project details should appear to the right of the Projects list. Click the Create Source button.
-
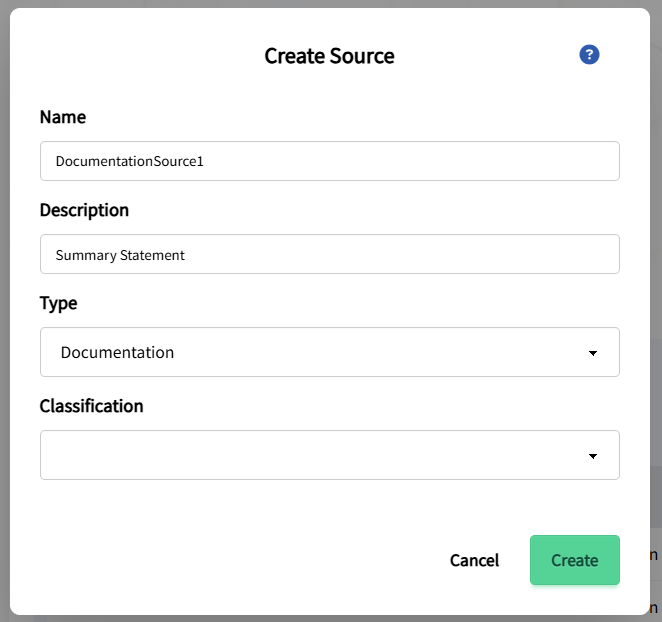
Fill out the fields in the “Create Source” form. A user should provide the Name, Description, and select “Documentation” as Type. For more information about the “Create Source” form fields, see How to Create a Source.
-
Click Create at the bottom of the form.
Once the Source has been created, it will appear in the Sources section of the Project details.
-
Next, configure Attribute Targets. See the Configure Attribute Targets section below.
How to Configure Attribute Targets
Source Attribute Targets are attribute names of desired data values in the document to target for data extraction. When a document is uploaded, the full set of Attribute Targets along with additional context information (see below) is submitted to the AI Model. Extracted values will appear in the Data Warehouse with the Attribute Target name. To configure Attribute Targets, a user must have an Analyst or Owner User Project Role on a Project associated with the Documentation Source, or they must have the PROJECT_ADMIN global permission.
To configure Attribute Targets, follow the steps below.
-
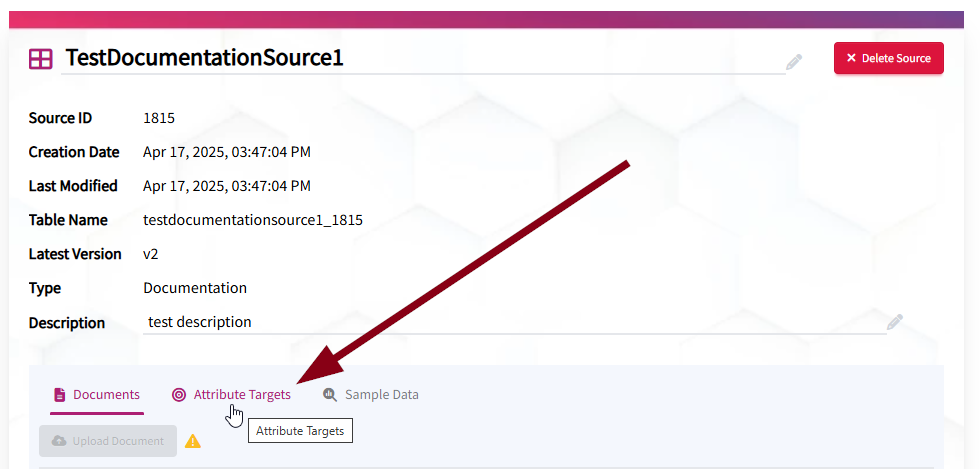
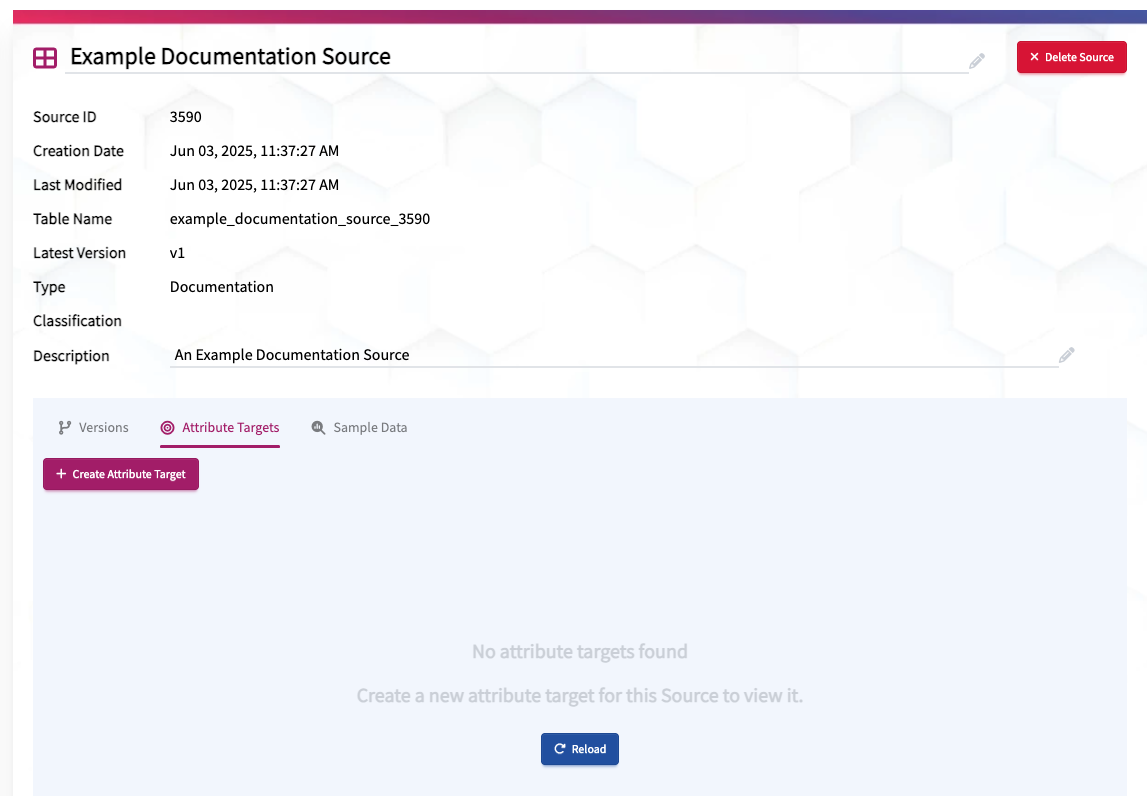
Select the Attribute Targets tab under Source details. This tab will only be visible on Documentation Source types.
-
Select the Create Attribute Target button to open a modal window allowing creation of an Attribute Target.
-
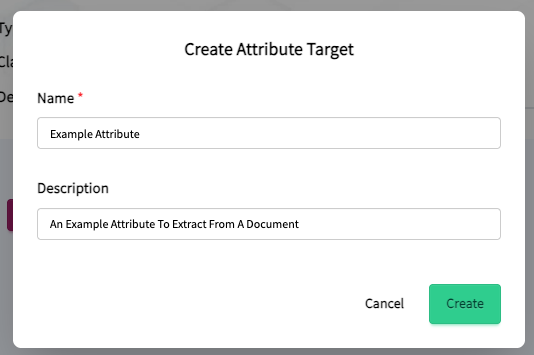
Create Attribute Target. Enter the desired Attribute name and its description. A user should create Attribute Targets based on information desired for future queries.
Attribute Targets should focus on simple extractions, using terms that are identified in the document. Attribute Targets do not need to be exact or match the text as AI can infer from the document and additional prompt context. This process might require several trials and thorough editing of Attribute Targets to ensure data being collected is what’s desired.
For example, Attribute Targets like “Legal Name” or “Role” are more precise than creating targets searching for “Name” only. This would yield more accurate results for the user and could require less time to make changes.
Note. For complicated Attribute Targets, filling out the Additional Prompt Context in DR Designer will provide supplemental information for the AI to extract the attributes. See the How to Add Additional Context for AI Extraction section for more information. Additionally, this process can also be accomplished via the API using the Update Source API.
-
Select the Create button to create the Attribute Target.
How to Update Attribute Targets
To update Attribute Targets, a user must have an Analyst or Owner User Project Role on a Project associated with the Documentation Source, or they must have the PROJECT_ADMIN global permission.
To update Attribute Targets, follow the steps below.
-
Select the Attribute Targets tab under Source details. This tab will only be visible on Documentation Source types.
-
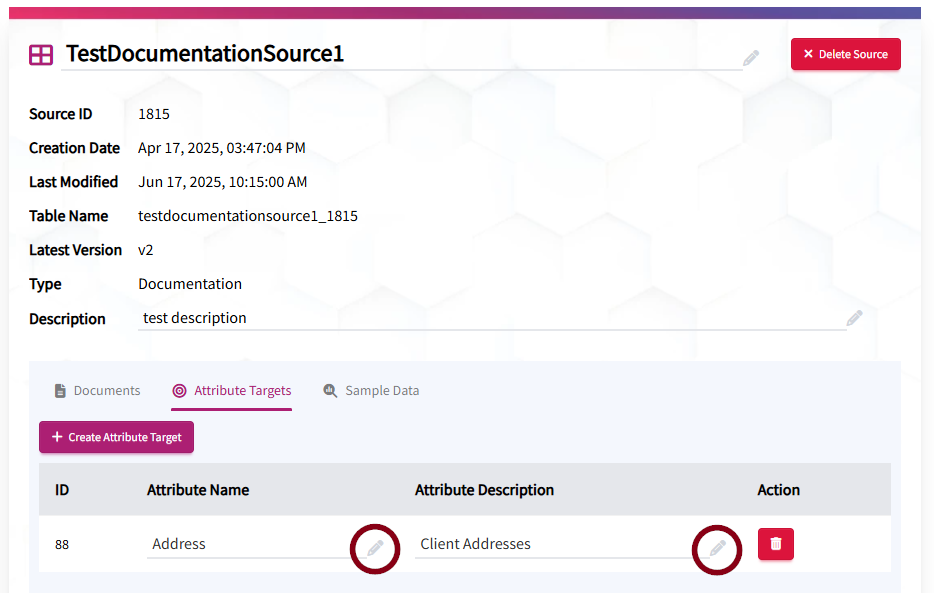
A list of Attribute Targets should appear. The “Attribute Name” and “Attribute Description” fields can be updated.
When hovering over or selecting the pencil icon next to “Attribute Name” or “Attribute Description,” a user can select one of these fields to edit.
- For Attribute Name, edit the field by selecting the box and typing a new name. All printable ASCII characters are valid.
- For Attribute Description, edit the field by selecting the box and typing a new description.
-
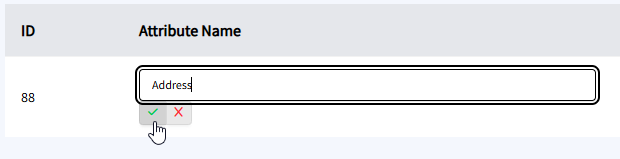
After editing a field, select the green checkmark that appears directly below the field to confirm changes (see image below). Select the red ‘X’ to discard the changes. If a selection is not made, the field will remain in edit mode. If a user navigates away from the Attribute Targets tab, all edits will be discarded.
Refer to the PUT (Update Source Attribute Target) API in the DR Designer API Projects Reference for instructions on how to update Source Attribute Targets programmatically.
How to Delete Attribute Targets
To delete Attribute Targets, a user must have an Analyst or Owner User Project Role on a Project associated with the Documentation Source, or they must have the PROJECT_ADMIN global permission.
To delete Attribute Targets, follow the steps below.
-
Select the Attribute Targets tab under Source details. This tab will only be visible on Documentation Source types.
-
In the Action column to the right of the Attribute Target, select the Delete button.

-
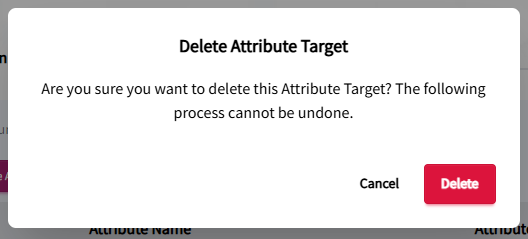
A dialog box will appear to warn the user that the Attribute Target will be deleted and the action cannot be undone. Select the Delete button to confirm the deletion or the Cancel button to return to the Attribute Targets list.
Upon deletion, the user will return to the Attribute Targets list.
Refer to the DELETE (Delete Source Attribute Target) API in the DR Designer API Projects Reference for instructions on how to delete Source Attribute Targets programmatically.
How to Add Additional Context for AI Extraction
In addition to the Attribute Targets, a user can provide more context to the AI for precise data extraction.
-
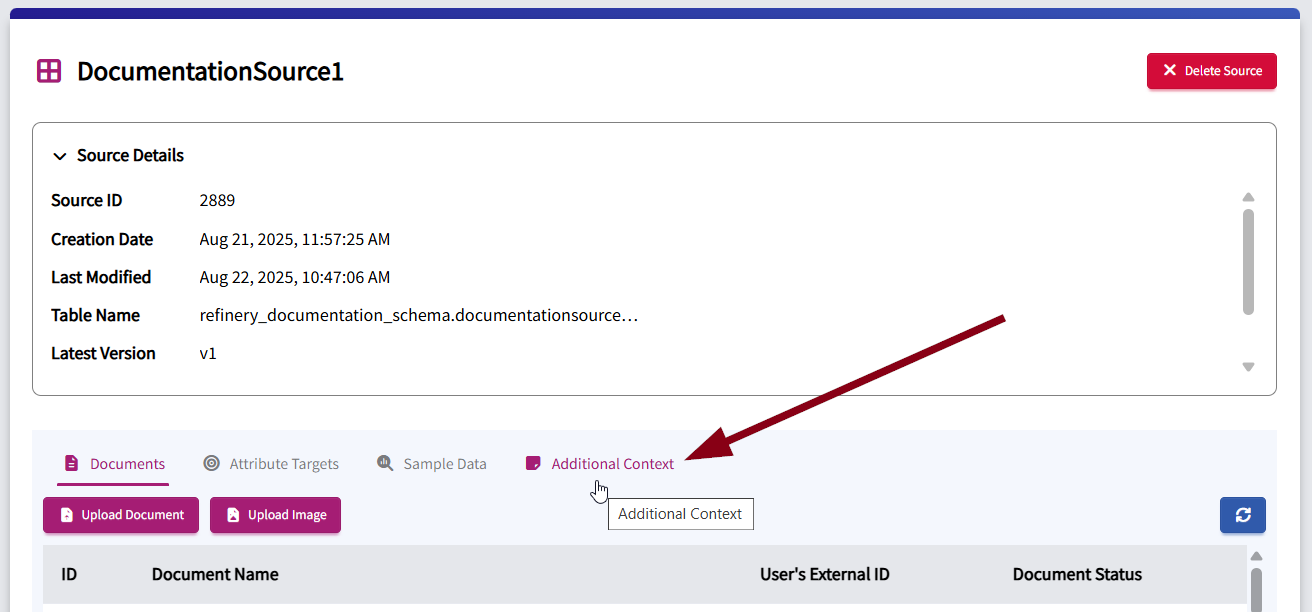
Under the desired Project and selected Documentation Source, click the Additional Context tab under the Source details.
-
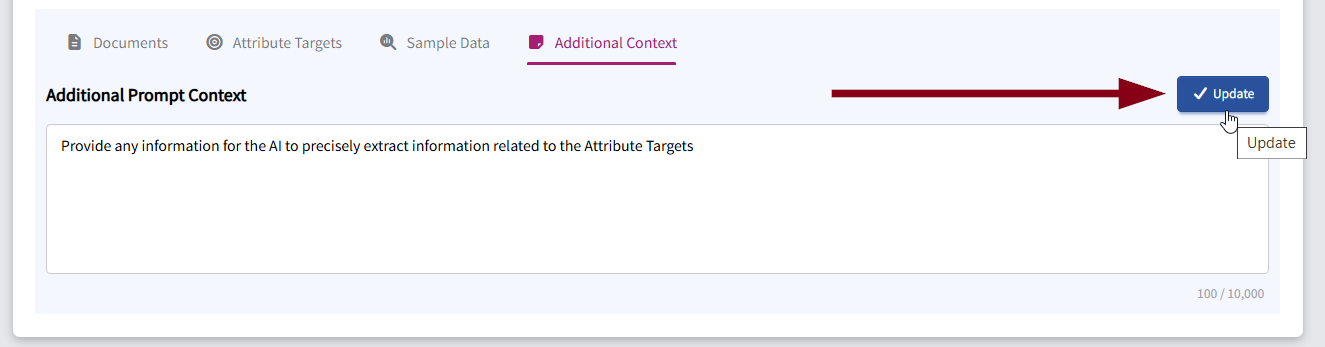
In the Additional Prompt Context box, provide any information for the AI to precisely extract information related to the Attribute Targets.
In 10,000 characters or less, the user should explain what the document contains for the AI to read. The user should explain what information should be extracted for each Attribute Target.
If there are several data points for extraction that are related to each other and can occur multiple times throughout the document, the data points should not be listed as separate Attribute Targets. Instead, ensure the user details an array including those data points within the context, and include the named array as the Attribute Target within Data Refinery.
Several iterations of this prompt may be required to yield precise results.
-
Click the Update button to save the additional prompt context.
How to Upload a Document
After a Documentation Source has been created and Attribute Targets have been configured, a user is ready to upload a document.
-
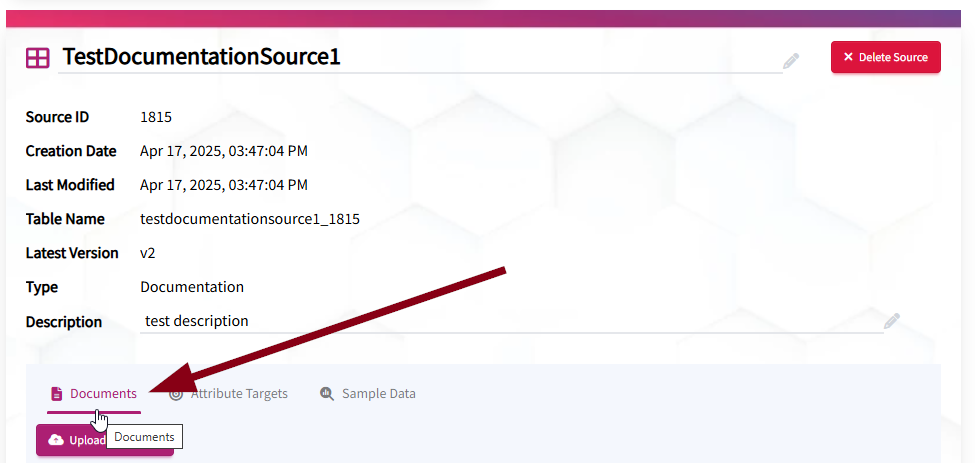
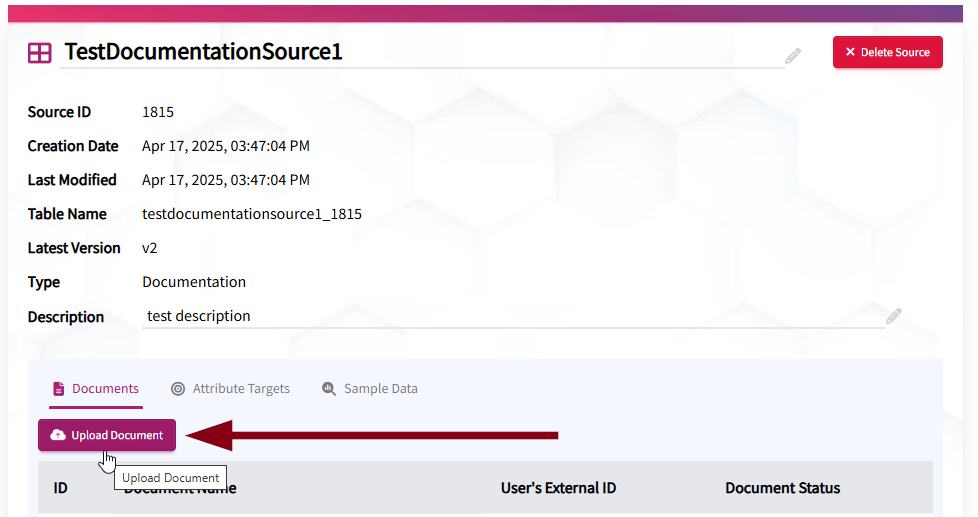
Under the desired Project, and linked Documentation Source, select the Documents tab under the Source details.
-
Select the Upload Document button.
-
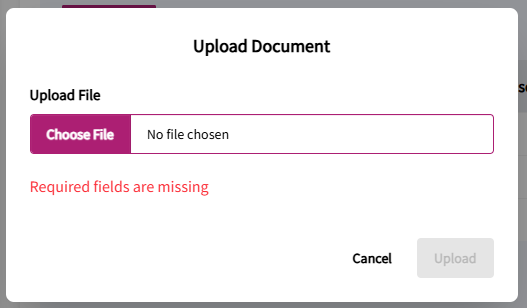
An “Upload Document” modal will appear. Click the Choose File button to select a file for upload.
-
Once a file has been chosen, click Upload to finish the process.
A user can check the status of the document upload by selecting the refresh button under the Documents tab.

How to Upload an Image
A Documentation Source can process well-known image formats including .gif, .jpg, .jpeg, .webp, and .png files. When uploading image files to Documentation Sources, the AI will extract data from the images based on the configured prompt context. Additional prompt context is required to effectively parse images, as the LLM will typically need context about what data is being extracted from the document and how it should interpret the images.
To upload an image, follow the steps below.
-
A user must configure at least one Attribute Target and provide additional prompt context before uploading an image.
See How to Configure Attribute Targets and How to Add Additional Context for AI Extraction for more information on completing these tasks.
-
After a Documentation Source has been created, Attribute Targets have been configured, and Additional Context has been provided, a user is ready to upload an image.
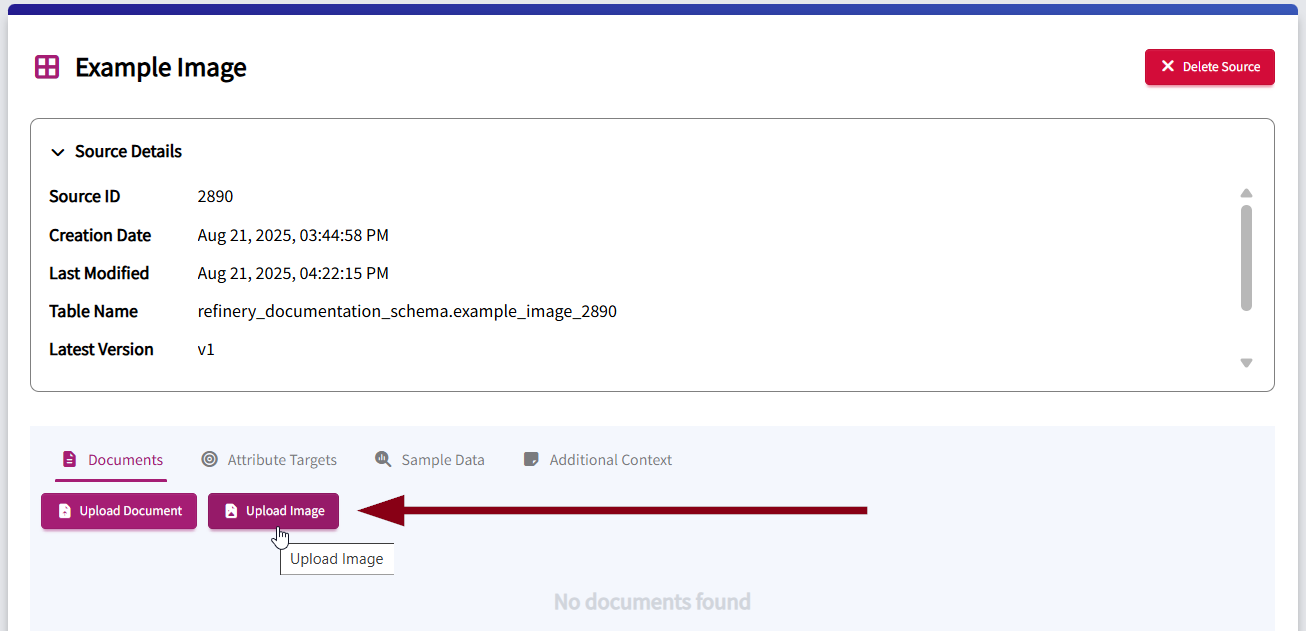
Under the desired Project, and linked Documentation Source, select the Documents tab under the Source details.
-
Click the Upload Image button.
-
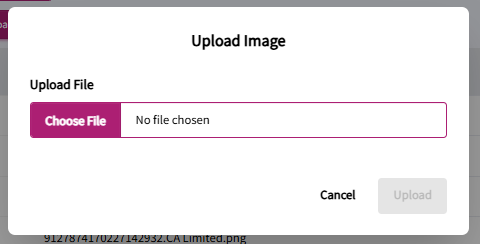
An “Upload Image” modal will appear. Click the Choose File button to select an image for upload.
-
Once an image has been chosen, click Upload to finish the process.
A user can check the status of the image upload by selecting the refresh button under the Documents tab.
Advanced Documentation Configuration
Mixed Content Processing
By default, Documentation Sources do not process image content from PDF files that have mixed content (text and images in the same file). When these files are uploaded, only the text will be processed. However, Mixed Content Processing may be enabled by the Source APIs for Documentation type Sources. When Mixed Content Processing is enabled, PDF files will attempt to extract data from both text data and image data at the same time.
To enable Mixed Content Processing, use the Update Source API to set mixedContentProcessing to true
curl -X 'PUT' \
  'https://example.workbench.kingland-data-refinery.com/api/sources' \
  -H 'accept: application/json' \
  -H 'Content-Type: application/json' \
  -H 'Authorization: Bearer $JWT_TOKEN' \
  -d '{
  "ID": 1,
  "mixedContentProcessing": true
}'
When processing documents with
mixedContentProcessingset to true, the cost of processing each individual document is greater due to the pricing structure of the underlying foundational LLM models. See Document Processing for additional information.
Max Output Tokens
By default, Documentation Sources limit the quantity of output from a single uploaded document to be 5,000 Tokens from the underlying LLM model. For Sources that may have a significant quantity of data extracted, this setting may be insufficient to extract all the data desired from the document. Depending on the underlying LLM model, the max tokens may be set anywhere from 1 token all the way up to 65,536 tokens. Setting the limit to the max value for every Source is not recommended, as using the maximum output token value reduces the size of documents that can be processed. In most cases, the default value of 5,000 will be sufficient.
To increase the setting for a Source, use the Update Source API to set maxOutputTokens to a given positive integer value. Setting the value to 0 or a negative integer will cause Data Refinery to use the default token value instead of the configured value:
curl -X 'PUT' \
  'https://example.workbench.kingland-data-refinery.com/api/sources' \
  -H 'accept: application/json' \
  -H 'Content-Type: application/json' \
  -H 'Authorization: Bearer $JWT_TOKEN' \
  -d '{
  "ID": 1,
  "maxOutputTokens": 10000
}'
If the maxOutputToken setting is too low for a given Source, the AI document processing will fail and upload no data for a given document. This is due to the fact that the output from the underlying AI model will be truncated at the max token limit, leading to corrupt data. If documents are consistently failing when uploaded to a Source, reach out to Kingland Support for additional help.
Data Refinery AI Privacy Information
Data Refinery uses Anthropic’s Claude through AWS Bedrock by default to process data uploaded to Data Refinery. Information on Bedrock’s security and privacy policies are available below.
Data Refinery does not log or store the requests or responses made to the AI model in their raw format, only the resulting attributes extracted from the documents are stored. After a document has successfully processed, the raw document is removed from the Data Refinery system and is no longer able to be retrieved. Metadata about the document such as its name and size are retained for audit and billing purposes.
Use of either OpenAI or direct Anthropic models through “Bring your own key” configurations is subject to license agreements directly between the customer and the respective AI model provider.
Streaming Sources
Streaming Sources represent data in a structured format from external systems where the data is received through an API instead of a data file upload. The data provided, whether a single object or an array of objects, needs to be in JSON format.This data is received and pooled to be uploaded in batches for analysis.
The API requires an Analyst or Owner UPR for the associated Streaming Source. For more information, see the Permissions and Roles page.
How to Stream Source Data
Once a Streaming Source has been created, data can be uploaded via the API.
To upload data, send a POST request to the /sources/streaming/{:ID}/upload endpoint using the following curl command.
   curl -X POST "https://dev.kingland-data-refinery-dev.com/api/sources/streaming/{:ID}/upload" \
    -H "Authorization: Bearer  $JWT_TOKEN"
    -D  '[
    {
      "id": "string",
      "first_name": "string",
      "last_name": "string",
      "email": "string"
    },
    {
      "id": "string",
      "first_name": "string",
      "last_name": "string",
      "email": "string"
      }
      ]'
A sample return response can be found below.
{ "count":2}
Note. The count in the response is the number of records that were successfully processed.
Once the data has been uploaded, data will be available to query when the next Glue Crawler is set to run.
Refer to the DR Designer API Sources Reference to learn more about uploading data to a Streaming Source.